
QUAKE II RTX
Getting Started
t

QUAKE II RTX
Getting Started
QUAKE II RTX - Getting Started
Introduction
This guide provides further information about the real-time ray tracing enhancements, and other
advanced features, that NVIDIA has implemented to create Quake II RTX
. Most noticeably, we have
introduced high-fidelity, real-time path-traced reflections, ambient occlusion, lighting, and shadows, which
is a world’s first for any game. For an explanation, check out this video:
https://www.youtube.com/watch?v=p7RniXWvYhY
Quake II RTX includes the first 3 levels of the game with our full suite of enhancements.
Purchase the full
game
to get access to all the levels, as well as multiplayer with path-tracing.
System Recommendation
The following system configuration, or better, is recommended:
● GPU: NVIDIA GeForce RTX 2060 or higher
● OS: Windows 10 64 bit or Ubuntu 18.04 LTS 64-bit
● CPU: Intel Core i3-3220, or AMD equivalent
● RAM: 8 GB RAM
Getting Started
1.) Ensure you have the recommended system specifications
2.) Have the latest Game Ready Driver installed.
3.) Install Quake II RTX
.
a.) Please see installer instructions below
4.) Launch Quake II RTX
via desktop shortcut.
5.) Set Recommended Settings
a.) Go to Video -> Set desired Global Illumination Setting (Recommended: Medium
)
b.) Set desired resolution (Recommended: 1080p
)
c.) Go back and click Game -> Choose desired difficulty.
Installer Instructions
1.) Windows (Demo)
a.) Launch the
Quake II RTX
installer executable, or download and run from Steam
b.) Make sure that "Quake II Shareware Demo" and "Desktop Shortcut" are both selected
c.) The Installer will install the RTX Demo and leave a shortcut on your desktop.
QUAKE II RTX
Getting Started
2.) Linux (Demo - Debian / Ubuntu Package)
a.) Install the Quake II RTX
.deb package
b.) The Installer will install the RTX Demo and leave an icon in your applications menu.
3.) Linux (Demo - Steam)
a.) Download and run Quake II RTX from Steam
Enable Ray Tracing for the Full Game
1) Purchase the full game
2) Launch the Quake II RTX
installer executable, or download and run from Steam
3) The installer will detect the Quake II executable location.
4) The installer will implement RTX with the full game and leave a shortcut on your desktop.
Playing the Demo
Quake II RTX
is a remaster of the classic game. Quake II
RTX
is fully ray-traced (using path tracing),
delivering highly realistic lighting, shadows, reflections, global illumination and more.
● Start game
○ Game > Easy
● Movement & Weapons
○ Left Mouse Button = Fire/Attack/Action
○ W = Forward
○ A = Strafe Left
○ S = Backward
○ D = Strafe Right
○ SPACE = Jump
○ CTRL = (Holding) = Crouch
○ SHIFT = Walk (default is run)
○ F = Flare gun
○ G = Grenades
● Give weapons and ammo
○ Press ~ (tilda) button to open the console
○ /give all = All weapons, ammo, items, keys
○ /dmflags 8192 = Unlimited Ammo
● Show RTX ON/OFF
○ Show RTX OFF
■ RTX OFF: Video > Renderer > OpenGL
■ RTX ON: Video > Renderer > rtx
QUAKE II RTX
Getting Started
Multiplayer Support
Quake II RTX comes with multiplayer support. There are multiple options to play this game in multiplayer
mode:
1. Join an existing public or private Quake II server online.
2. Start a server directly from the game.
3. Start a dedicated server and join it.
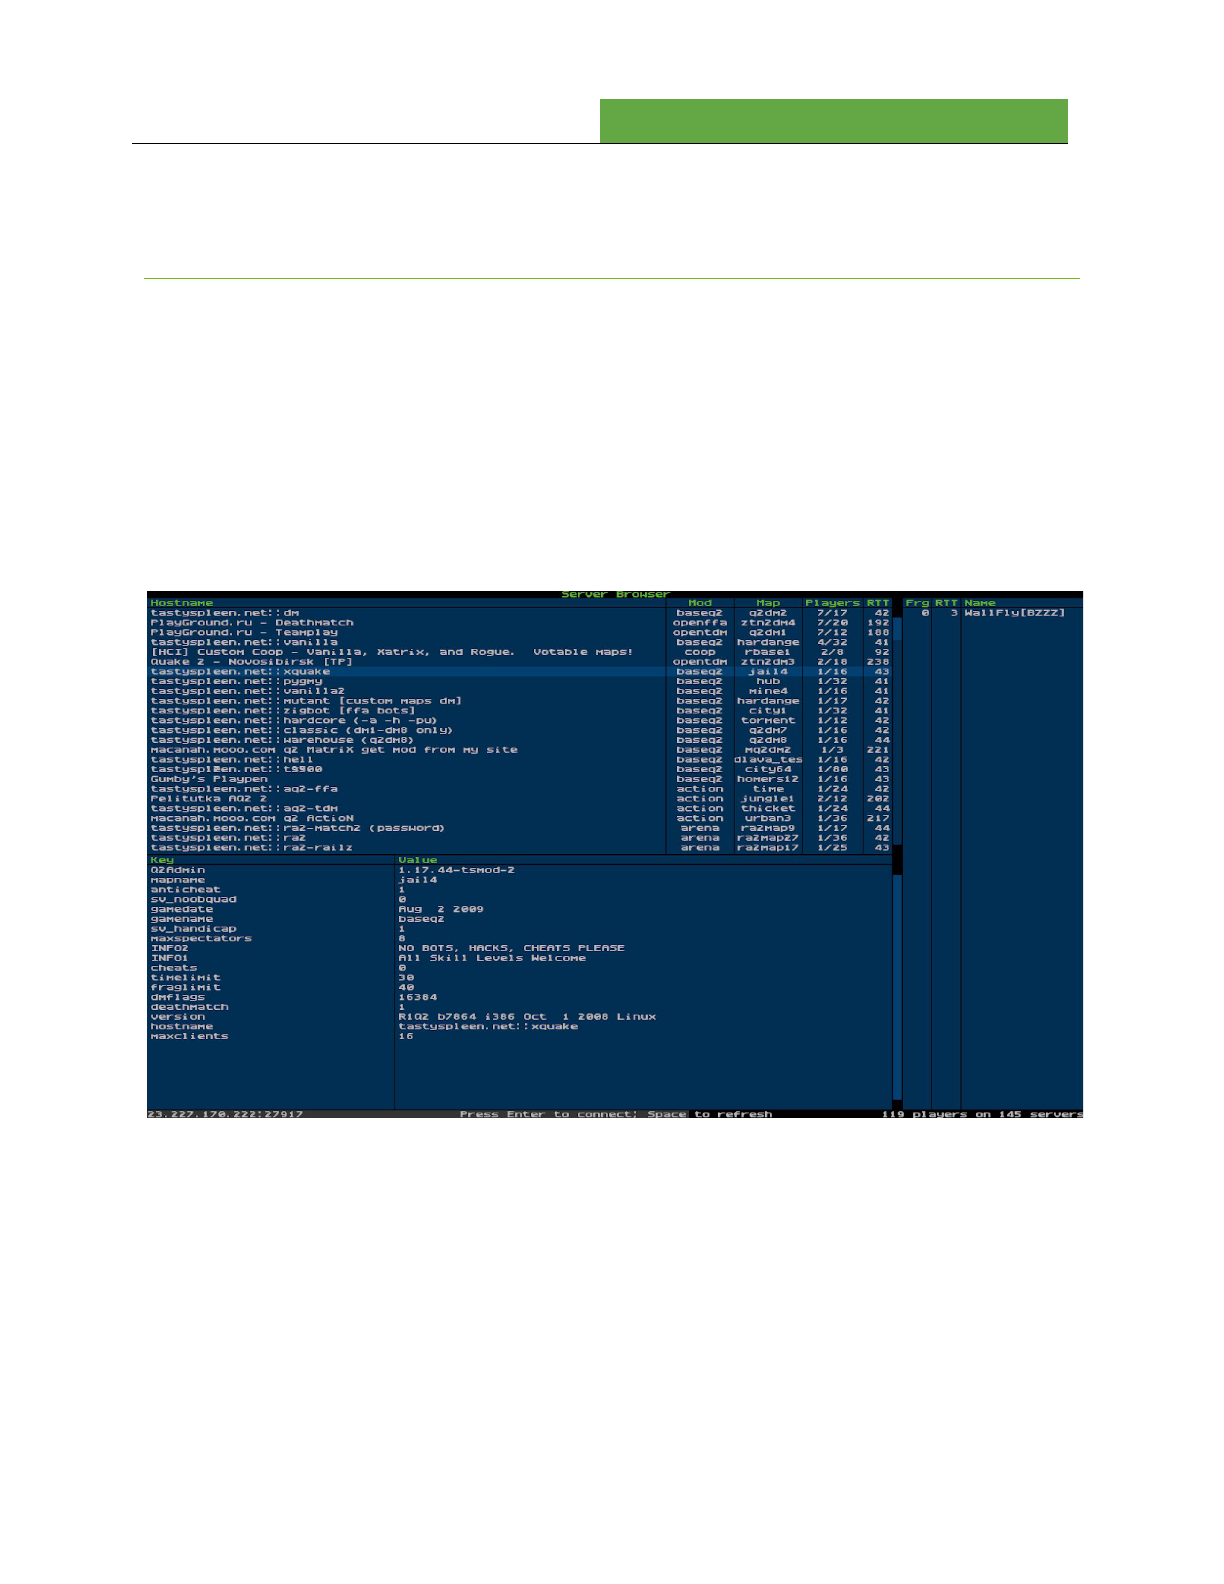
Joining a server
There are two ways to join an existing server: through the server catalog on q2servers.com, and
manually. The catalog is available through the Multiplayer menu:
To join an unlisted server, open the console and type “connect <address>”.
If the server is password protected, open the console and type “password <password>” before joining the
server.
Note that when playing on non-Q2RTX servers, you may observe some compatibility issues:
- Rockets and other items may disappear in certain pools of water, which were opaque in the
original Quake II;
- Flare gun will not be available;
- Gameplay mods or custom maps may be incompatible with Q2RTX.
QUAKE II RTX
Getting Started
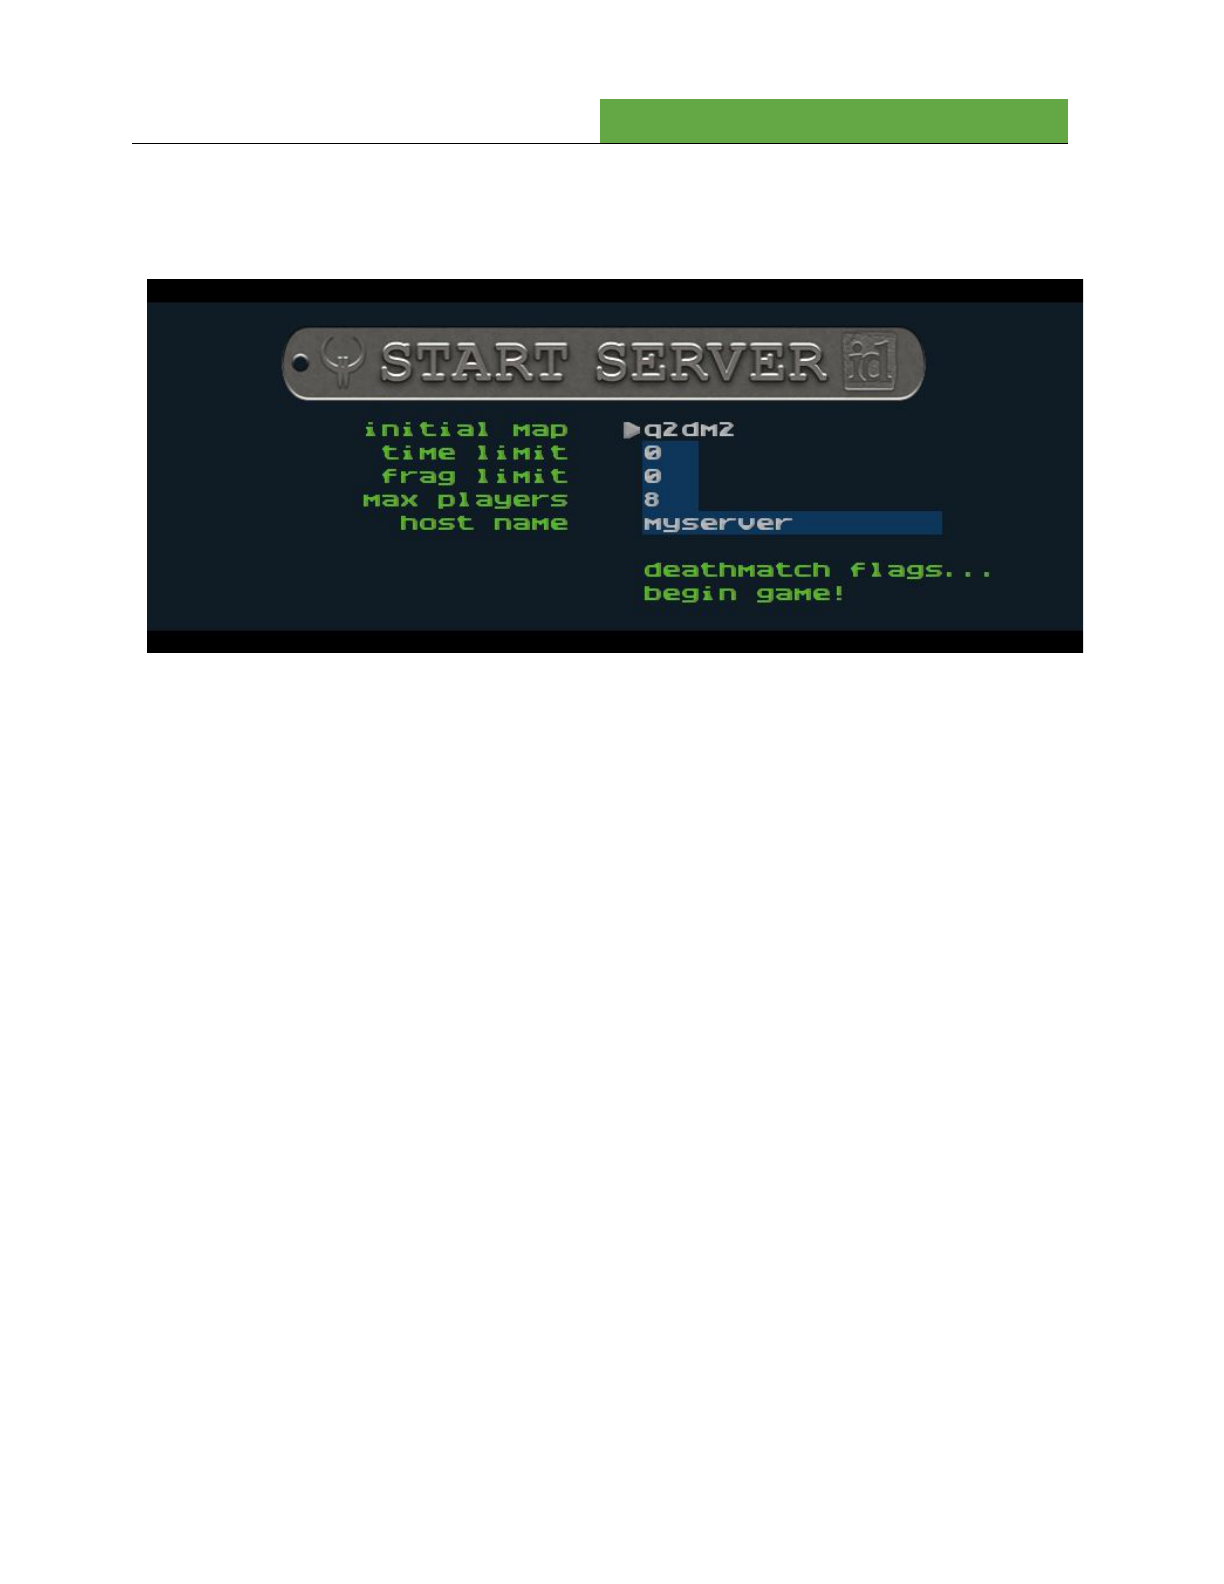
Starting a server from the game
In the multiplayer menu, select “start server”. The following dialog will appear:
Starting a dedicated server
Quake II RTX ships with a separate dedicated server executable, “q2rtxded.exe” (on Windows). This is a
lightweight version of the game that can only act as a server, but doesn’t allow you to play it directly and
doesn’t have any graphics.
Simply launching the dedicated server will make it start a deathmatch session on the first available map,
which is “base1”. You can change the map and other game settings using the server console, or you can
put those commands into a config file and execute that file on server startup using the command line. For
example, you can put something like this in a file called “server.cfg” in the baseq2 directory:
set password <password>
set rcon_password <another_password>
set deathmatch 1
set coop 0
set sv_maplist q2dm1 q2dm2 q2dm3 q2dm4
set timelimit 20
set fraglimit 20
map q2dm1
Then start the server using command line:
q2rtxded.exe +exec server.cfg

QUAKE II RTX
Getting Started
Server configuration
Many of the console variables useful for dedicated server administration are documented in the Q2PRO
server manual - since Quake II RTX is derived from Q2PRO, these variables still apply. We have added
some more variables to control RTX specific features:
sv_flaregun
: controls whether players spawn with the flare gun and ammo for it. 0 means no flare
gun, 1 means spawn with the flare gun but no ammo, 2 means spawn with the flare gun and 5 grenades
(because the flare gun uses grenades).
sv_restrict_rtx
: if set to 1, makes the server available only to clients playing Quake II RTX; other
clients like the regular Quake II or Q2PRO will be rejected.
sv_savedir
: path to the directory within baseq2
where the server will save game state in
cooperative play mode. If multiple dedicated cooperative servers are started from the same installation
directory, they should use different directories to save game state.
The sv_flaregun
and sv_restrict_rtx
settings have been added mostly for compatibility reasons. Quake II
RTX uses the regular Quake II network protocol (version 36 from Q2PRO), but the flare gun is an
extension to the protocol. If both Q2RTX and other clients participate in a multiplayer game, and the
Q2RTX user fires a flare gun, other clients that see the flare will disconnect because they do not
understand what that means. So it is advised to either disable the flare gun on MP servers, or to make the
servers only available to Q2RTX players.
© 1997 id Software LLC, a ZeniMax Media company. QUAKE, id, id Software, id Tech and related logos are registered trademarks or trademarks of id Software LLC in the U.S.
and/or other countries. Bethesda, Bethesda Softworks, ZeniMax and related logos are registered trademarks or trademarks of ZeniMax Media Inc. in the U.S. and/or other
countries. All Rights Reserved.
This product is based on or incorporates materials from the sources listed below (third party IP). Such licenses and notices are provided for informational purposes only.
Quake II: Copyright (C) 1997-2001 Id Software, Inc. Licensed under the terms of the GPLv2.
Q2VKPT: Copyright © 2018 Christoph Schied. Licensed under the terms of the GPLv2.
Quake2MaX "A Modscape Production": Textures from Quake2Max used in Quake2XP. Copyright © 2019 D Scott Boyce @scobotech. All Rights Reserved. Subject to Creative
Commons license version 1.0. Roughness and specular channels were adjusted in texture maps to work with the Quake II RTX
engine.
Q2XP Mod Pack: Used with permission from Arthur Galaktionov.
Q2Pro: Copyright © 2003-2011 Andrey Nazarov. Licensed under the terms of the GPLv2.
