Create Invoice Template
Quick Reference
Create Invoice Template
Create New Pre-Approval Re
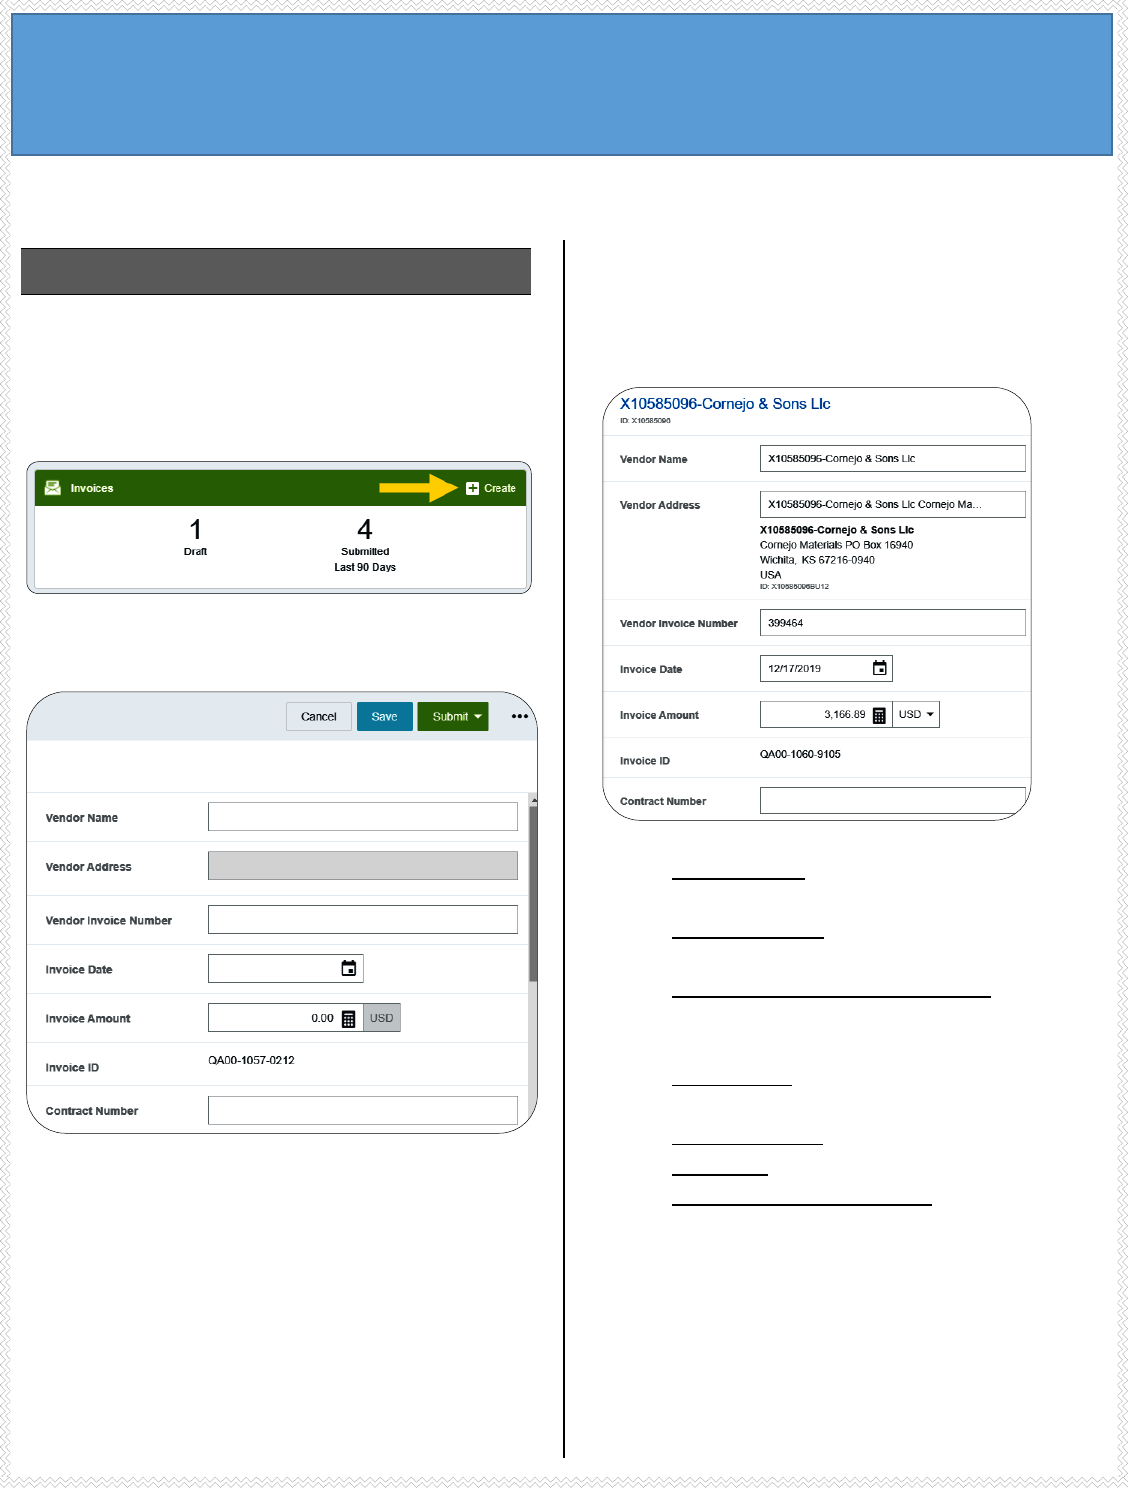
1. Click the +CREATE button in the upper right corner
of the Invoices swim lane.
2. The invoice page is displayed
3. Complete each of the appropriate fields in the
invoice header section. The populated fields and
values will be pulled into any invoices created from
this template.
• Vendor Name: Fully searchable by the vendor
number, or any part of the vendor name.
• Vendor Address: Auto populates if there is only
one address listed, otherwise fully searchable.
• Vendor Invoice Number (optional): List as it
appears on the vendor invoice, up to 36
characters.
• Invoice Date: Date listed on the vendor’s
invoice.
• Invoice Amount: Total amount to be paid.
• Invoice ID: System Generated.
• Contract Number (optional): State or WSU
issued number if applicable.
Page | 2
Invoice Detail
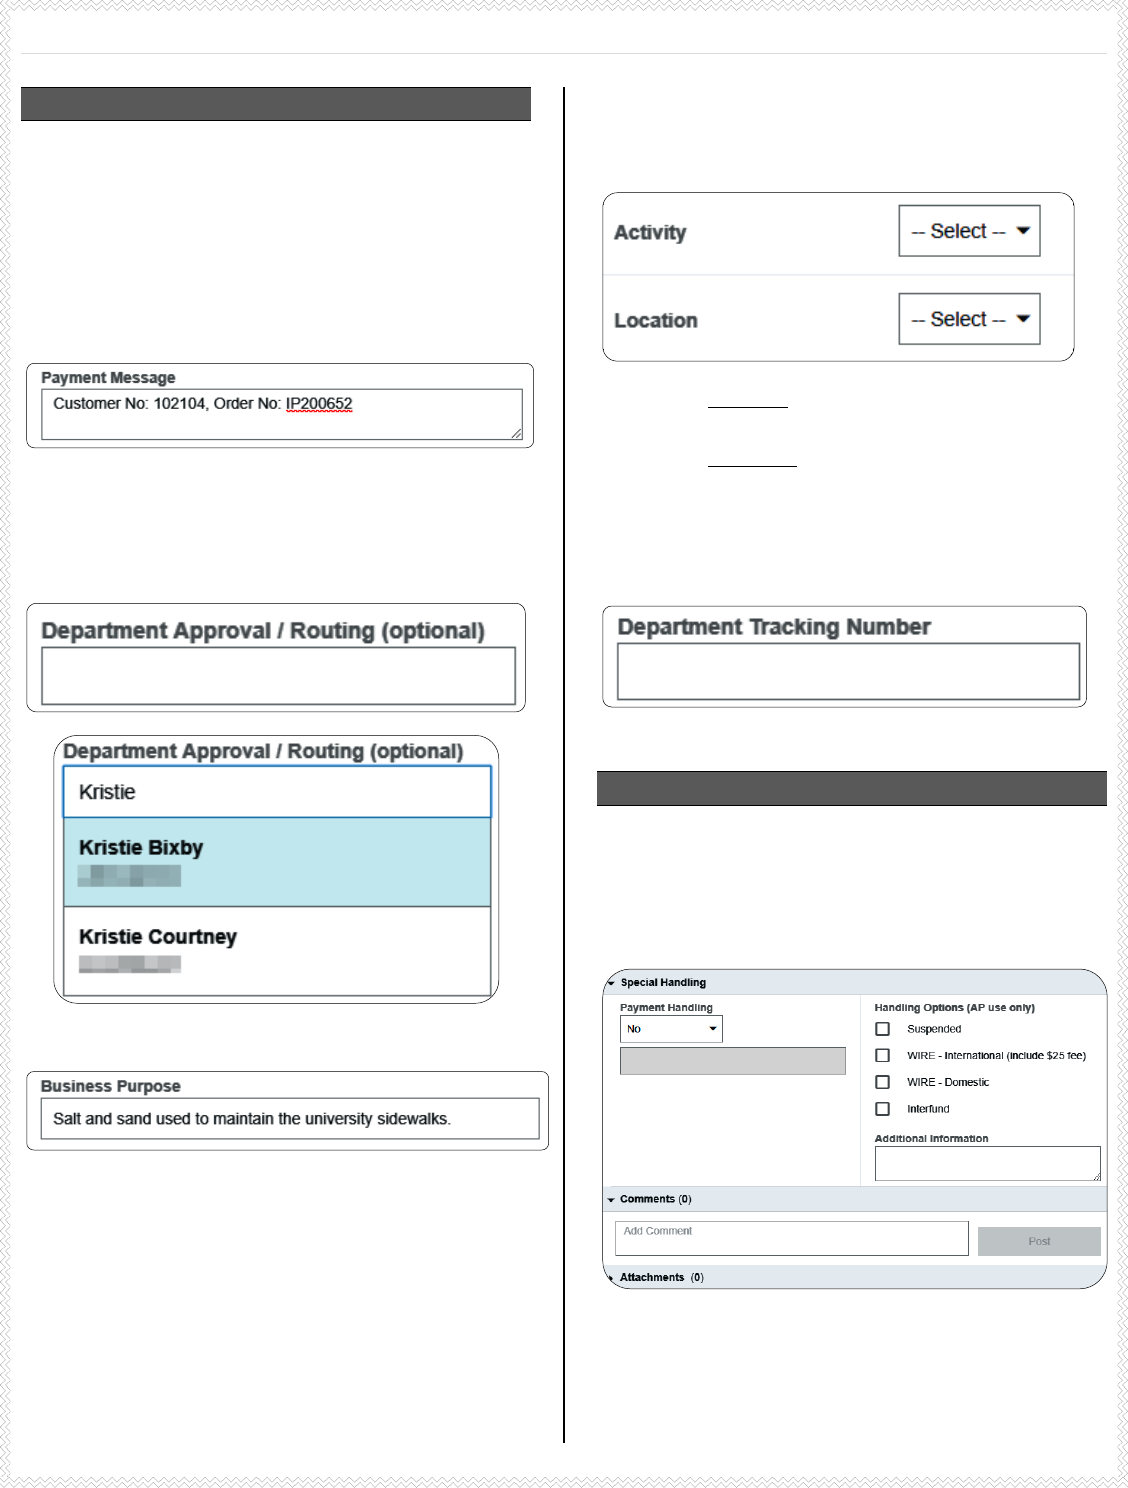
4. Enter Payment Message (optional - 70 characters)
with identifying information for the invoice such as:
• Account Number
• Customer Number
• Order Number
• Brief description (Maintenance Subscription
10/23/19-10/22/20)
5. Enter a Department Approval / Routing name
when additional staff are required to review the
invoice. This field is optional.
6. Enter a detailed Business Purpose.
• A business purpose is defined as one that
supports or advances the goals, objectives and
mission of the university; and adequately
describes the expense as a necessary,
reasonable and appropriate business expense
for the university.
• The field appears small but has a high character
limit (>220)
7. Activity and/or Location: If your department utilizes
these fields, select the proper value, otherwise
leave blank.
• Activity: Click the drop-down box and select
the appropriate value from the list.
• Location: Click the drop-down box and
select the appropriate value from the list.
8. The Department Tracking Number field is an
optional field a department can utilize.
Special Handling, Comments and Attachments
9. Items entered in the Special Handling, Comments
or Attachments section will not populate on an
invoice created from a template. Leave the default
values in these fields.
Page | 3
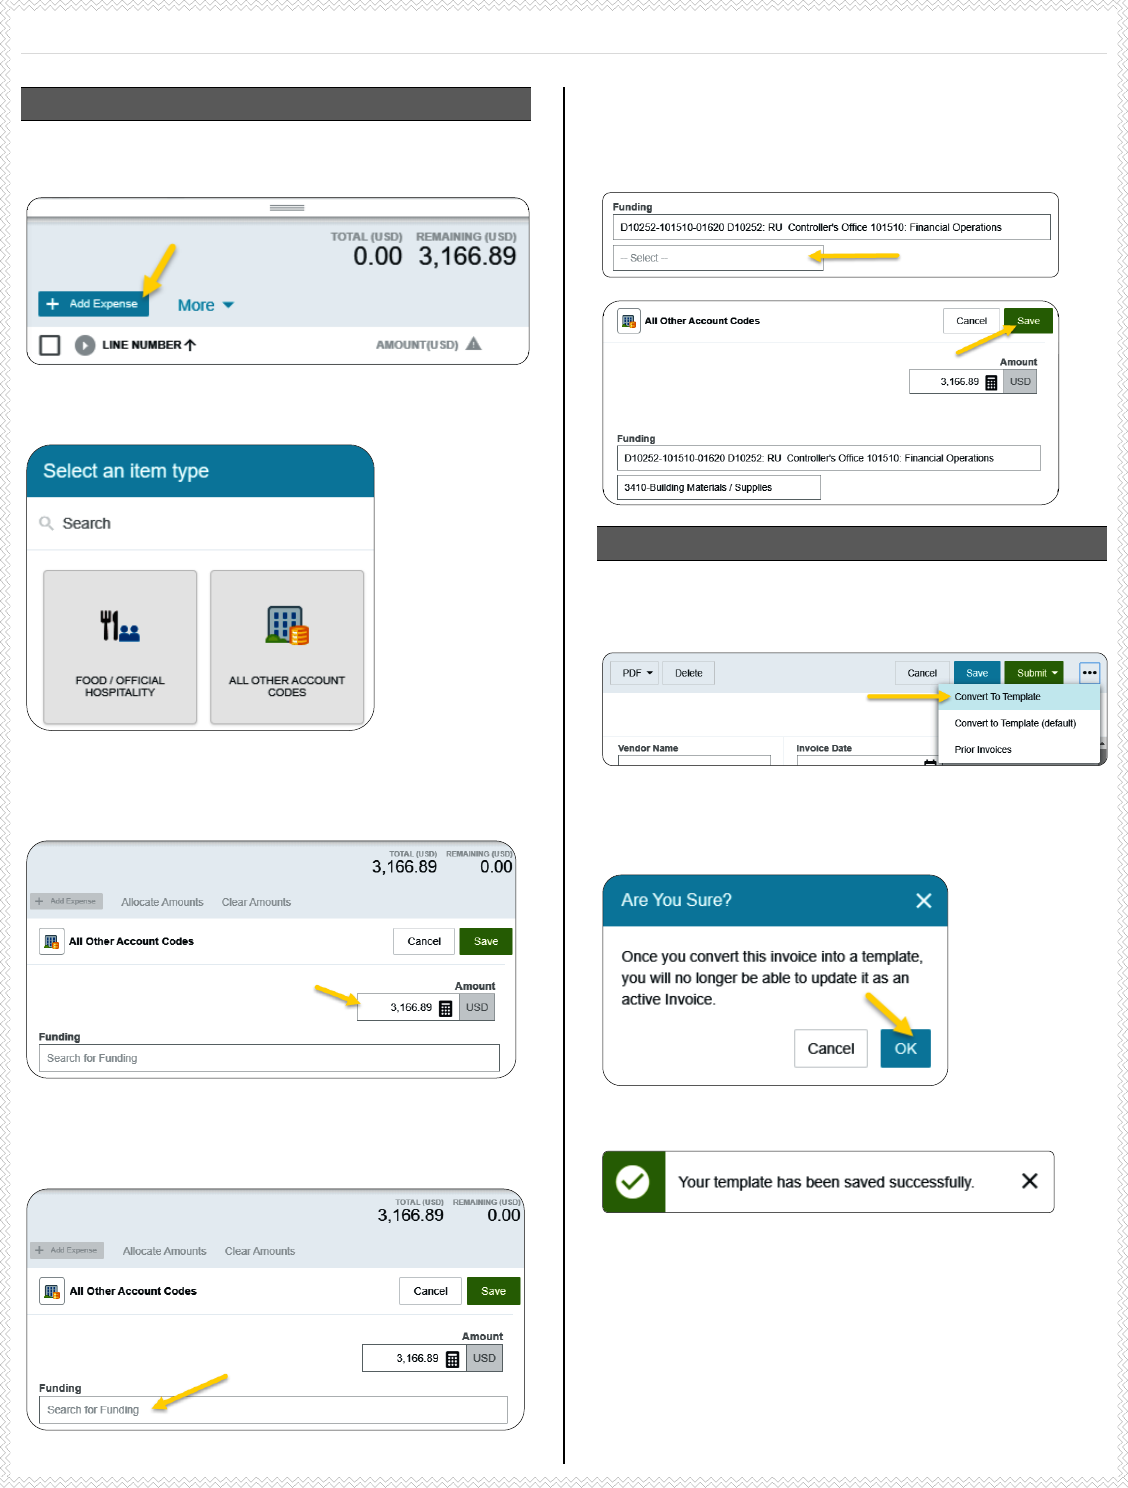
Add Expense
10. Click on the + Add Expense button.
11. Select an expense tile.
12. Enter/verify the total amount of the invoice
allocated to this funding/account code selection.
13. Funding: Search for and select the appropriate
funding.
14. --Select-- Tap anywhere in this field to search for
and select the appropriate account code. Save the
expense line.
Convert To Template
15. Click the three dots icon (…) in the upper left
corner. Select Convert to Template.
16. The following warning message will display - click
OK to continue.
17. The following message will display.
18. This will convert the invoice to an invoice template.
Please note: the information previously entered on
this page is no longer an active invoice once
converted to a template. No payment will be
generated! See the Create Invoice from Template
quick reference guide for detailed instructions.
