
Actian Web Training Document
Supplier Enablement - ConocoPhillips
IMPORTANT: In addition to this training document, applicable fields in each Actian Web
Portal transaction will have a question mark symbol that provides a pop-up with detailed
information when hovered over.
Welcome to the web-based training for the Actian Business Xchange Web Portal! This portal is
a secure website that you will use to enter and submit your invoices to ConocoPhillips.
After reviewing this document, you should have a better understanding of what functionalities
are available to you.
Once you have successfully logged into the Actian Web Portal, the first thing you will need to do
is create a template(s), depending on the business needs.
Creating a Template
To create your first template, click “Create Transaction,” select any webform under the
ConocoPhillips Global receiver, and select “Add New or Edit” in the Template Selection screen.
Things to remember about templates:
• You must set up a template before creating an invoice
• Template information cannot be changed while creating individual invoices
• You can create as many different templates as required
• A separate template is required for each currency
• If there are multiple users, it is best for each user to set up their own template(s)
o Note: Name the template so that you know it’s yours
• You will be able to see and access everyone’s template(s) not just your own
• Changes made to a template will only affect new invoices created after the change
Delivery Information
Please use the address information below to fill out the Delivery Information section:
• Ship to Name:
• Contact Name:
• Address:
• City/State or Region/Postal Code:
o Note: The delivery information section may also correspond with the
ConocoPhillips address where the goods or services were delivered or
performed.

Supplier Contact Information
• Please ensure that you enter in the appropriate contact information for the person
from your company who will receive any invoice error messages or questions from
ConocoPhillips.
Remit to Information
• Most suppliers will only have one number to choose, usually your “head office”
vendor number.
o Note: If you have multiple vendor numbers in the drop-down list, please
reference your PO, OLA or field stamp to determine which vendor number to
use. If you are informed that you have multiple vendor numbers, you must
create a template for each.
Once you have successfully created your template(s) you are ready to begin submitting
invoices!
Creating a Transaction
Which transaction type should I use?
• Use the Transaction Type Selection Guide available in the Web Portal under Create
Transaction.
• The first Header section contains fields to be completed. If there is an asterisk (*),
you must complete that field.
o Depending on the Transaction Type selected, the fields may change
• The Line section is where you will enter the detail of your itemized charges.
o If more than one item contributes to the invoice total, an invoice line will
need to be created for each item.
o If you are referencing a purchasing document, the invoice line items must be
a one-to one match with the purchasing document line items (i.e. do not
enter multiple PO lines as a lump sum on one invoice line item).
o Different fields may appear or become required/non-required based on the
invoice type (transaction) selected.
o You can enter line items individually, or upload multiple line items from an
Excel template (see the topic Upload Lines)
Upload Lines from Excel – Downloading Template
• If you have multiple lines to enter, it is easier (and recommended) for you to enter
your data on our Excel Template and upload your lines from there. Remember the
following things when uploading line items:
o There is a limit of 500 lines per invoice
o Ensure you are using the correct Transaction Type before downloading the
template
o For large invoices, add any attachments before uploading line items
o Always download a new version of the template for each invoice
▪ Note: The line item uploader is on the lower half of the transaction
screen.
• Required fields must be entered on the Excel file just as with manual line item entry
• You can hover your mouse on a column heading to view a description of the field
• Use Browse to locate your completed file after saving
o Depending on your internet browser, the “Browse” button may be displayed
as “Choose File”
• Use the Upload Line Items to perform the upload
o Tip: Look out for these common causes for errors:
▪ Upload, then distribute invoice line totals between cost objects, if
applicable
▪ Country not selected on the Header Sheet tab
▪ The file not saved in Excel 2003 or a later version
▪ Some required fields not entered
▪ Date formatting in file does not match Transaction Type template
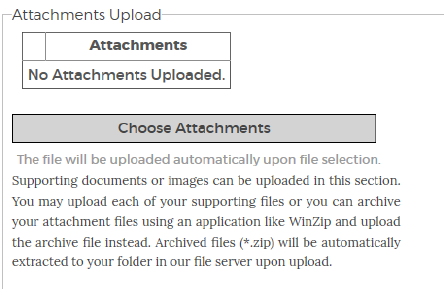
Adding Back Up Documents Before Invoice Submission
• This is where you will attach supporting information for the invoice; timesheets,
signed proof of completion documents from the field, etc.
• To add an attachment to your invoice, click the Choose Attachments button
o File requirements:
o File name must be unique for any attachment ever sent
o File name can only contain letters, numbers, hyphens and
underscores
o File name must be less than 60 characters
o File must be less than 40 MB in size
▪ Note: Scan in low resolution black and white to reduce file size
o Only these file types are allowed – PDF, DOC, JPG, TIF, XLS, DOCX,
XLSX
o
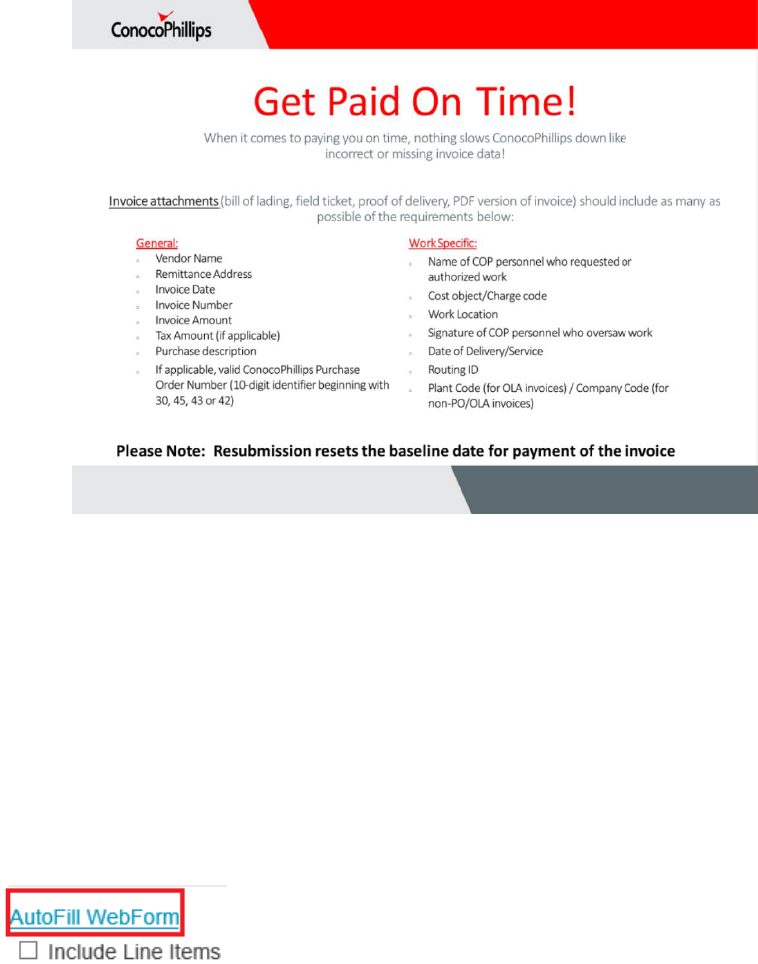
Copying Last Invoice Submission
• Copying an invoice can be useful if you submit invoices with the same or similar
information on a regular basis. There are two ways to copy an invoice.
1. Use Autofill (copies the most recent invoice submission)
a. Clicking this link populates the transaction with all the information from
your last entered invoice.
b. Selecting Include Line Items will include the line items from your last
invoice.
i. You must check the box before clicking the AutoFill Transaction
2. Access a previous invoice from the ‘Submitted’ folder of your Outbox and copy it.
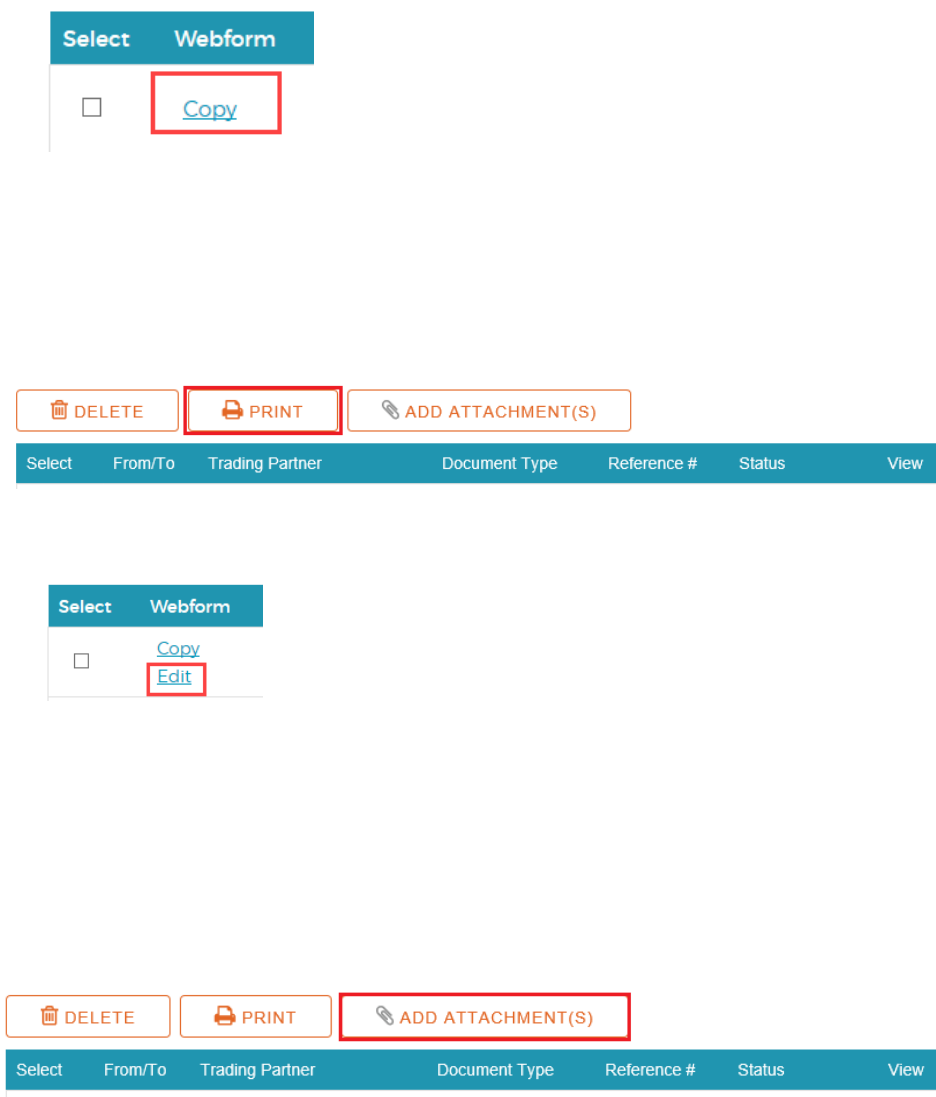
Editing and Printing Existing Invoices
• Go to the OUTBOX Summary in the mailbox
• Click the box for your invoice in the “Select” column
• Click the Print button to print)
• Access a saved invoice from the “Draft” folder of your mailbox’s Outbox, then Edit to
open a saved draft invoice for editing.
Adding Backup Documents After Invoice Submission
• There may be times when you need to submit back up documents for an invoice
after you have already submitted the invoice. This can be done in the Mailbox.
o Go to the OUTBOX Summary in the mailbox
o Click the box for your invoice in the “Select” column
o Click the Add Attachments button to add your backup document(s)
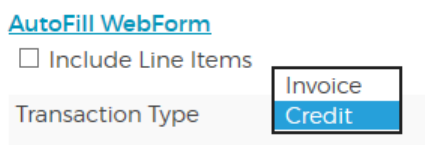
Entering a Credit Memo – Header
• Create a credit memo in the same way you would create or copy an invoice.
o To create from scratch: Select the appropriate transaction type and
template, then fill in required fields.
o To create from Copying the Invoice: Amend and complete the fields as
required in the header and line items.
• Select ‘Credit’ as the Transaction Type
Entering a Credit Memo – Line Items
• Complete the line items as you would for an invoice, completing all required fields.
o The following fields are unique to credit memos for material PO’s:
▪ *Orig. Line # - Original invoice line item
▪ *PO Item Ref. – Purchase Order line item
o Use positive numbers in the *Quantity and *Price fields (for both invoice
types), the system automatically converts these numbers to negatives for the
credit calculation.
o If original invoice was short paid, enter the credit as the original invoice was
short paid rather than as the original invoice was billed
o If submitting credits for multiple invoices, submit one credit per original
invoice.

Additional Actian Tools:
PO Xchange: PO-to-Invoice
• Allows ConocoPhillips to transmit Purchase Order data into Actian inbox of applicable
suppliers (contact your ConocoPhillips representative if you are interested in this tool).
• Supplier can view the PO and convert the PO data into an invoice, eliminating the need to
manually re-key the PO data into the invoice web form.
Actian Support
• To set up a new user ID or to make updates to your logon information, please contact
Additional ConocoPhillips Tools:
MyVP Website and Service Now
All accounts payable inquiries should be routed through Service Now.
• External users can utilize the MyVP Website at http://xapps1.econocophillips.com/myvp to
open a Service Now Ticket. If this is your first time using MyVP or submitting a Service Now
Ticket, please utilize our vendor website http://vendors.conocophillips.com/invoice-status/ .
• If you require assistance in opening the ticket, please contact the appropriate vendor inquiry
line and they will walk you through the process.
o United States - 918-661-5746
o Canada - 403-532-5088
o UK - 1224 205007
▪ Norway Help Desk - (+47) 5202 4062
For more helpful training and information, once logged into the
portal, go to the “Get Help” tab at the top of the page, click “Training”
and choose your country.
